Overflowing with love: Chocolate Whoopie Pies!

DSC_0032

I guess this is me enjoying my break. It’s so weird. I thought I’d be more active with this blog once I got out of school. Oh whale.

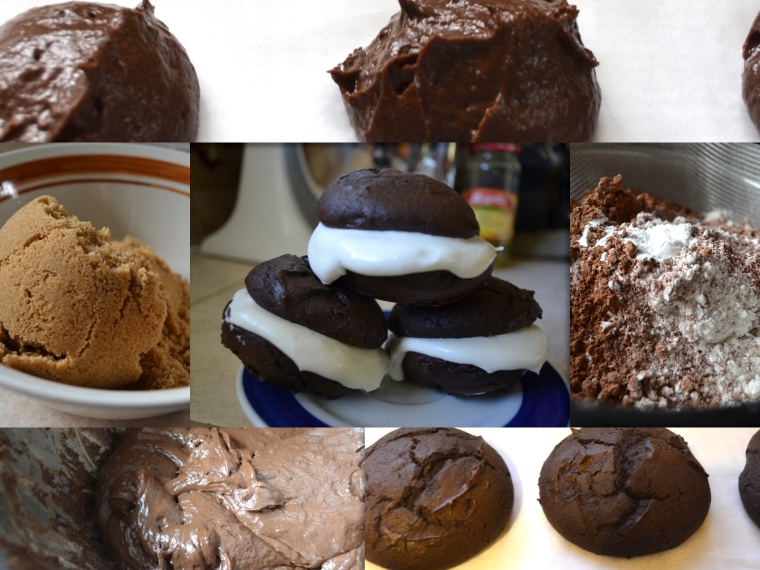
As you can see from the picture above, we made chocolate whoopie pies with (a little too much) cream cheese frosting! These really remind me of Oreo Cakesters. Almost tastes the same too! We got the recipe from this website.

Classic Chocolate Whoopie Pies
From Whoopie Pies
(Makes about 12 medium-large whoopie pies)

1 2/3 cups of all-purpose flour
2/3 cup of unsweetened cocoa powder
1 1/2 teaspoons of baking soda
1/2 teaspoon of salt
4 tablespoons of unsalted butter
4 tablespoons of vegetable shortening
1 cup of brown sugar
1 large egg
1 teaspoon of vanilla extract
1 cup of milk

  1. Preheat the oven to 190°C (375°F) and have all ingredients at room temperature. Lay out your parchment paper on your baking trays (I used two trays).

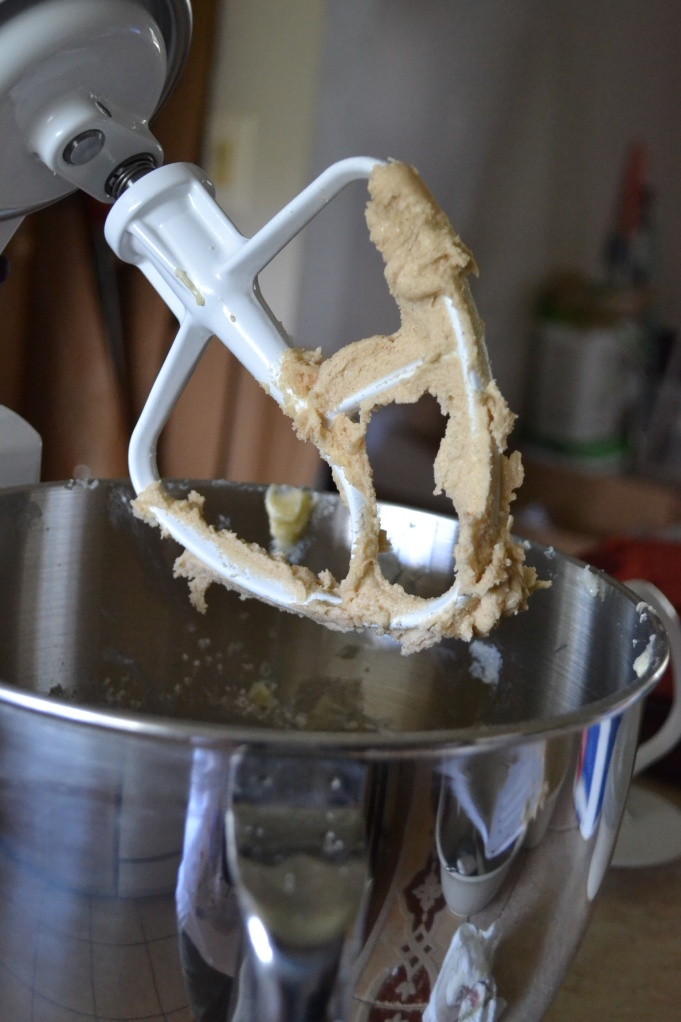
  2. Using your mixer, beat the butter, shortening, and sugar together.

  3. Add in the egg and vanilla extract.

  4. Sift together the flour, cocoa powder, baking soda, and salt (as I am typing this, I just realized I forgot to add in the salt this morning!).

  5. Add half of the dry mixture and half of the milk to the wet ingredients. Mix until combined.

  6. Add in the remaining half of the dry mixture and the milk. Mix until completely combined.

  7. Using a spoon or ice cream scoop, drop 1 (mini) or 2 (medium-large, what I made) tablespoons of the batter onto your parchment paper. Remember to evenly space the batter. I was able to fit twelve of the 2 tablespoons on one tray.

  8. Bake for 10-15 minutes or until cakes spring back when lightly tapped. Remove from the oven and let it cool on the tray for 10-15 minutes.

  9. Gently remove the cakes from the parchment paper and allow it to cool.

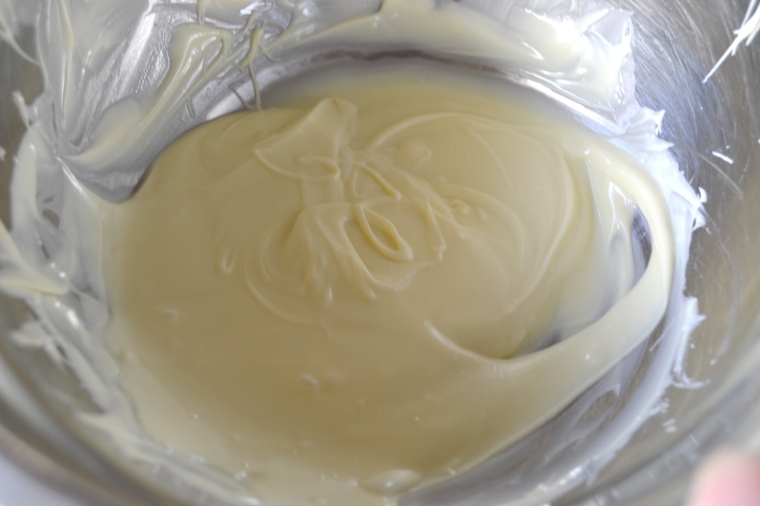
  10. Make your favourite frosting to fill the whoopie pies!


DSC_0008

DSC_0006

Although I’m not much of a fan of chocolate cakes or chocolate ice cream (vanilla, ftw!), Julius LOVES chocolate. Whenever we go out for frozen yogurt he always gets every kind of chocolate flavor available. I’m not kidding.

DSC_0009

DSC_0019

It’s not surprising that he went crazy over the chocolate batter.

DSC_0020

Unfortunately our whoopie pies had cracked tops when we took them out of the oven. I researched why and people said it was probably because the oven was too hot. The next time I attempt this recipe, I’ll definitely check the oven’s temperature with my newly bought oven thermometer! Woot woot. I seriously love my oven thermometer. It’s so friggin’ useful I swear.

DSC_0037

Overflowing with love.

First Attempt: Red Velvet Cake Balls

DSC_0145

…Yeah no “clever” title this time. I doubt anyone misses it (heheh).

I really thought I’d be a lot more productive during this semester break. Sorry for neglecting you, 50FirstCakes! Although I haven’t been posting, I sure have been baking. I still have two more posts to write! Let’s get going then shall we?

My relationship with red velvet cake is well…neutral? It tastes good, but I’m not totally in love with it. I bake it because it seems like everyone ELSE loves it, and I hate to disappoint. As you can see from the first photo, I was a little sloppy this time. I find it funny that it looks like the cake ball is sweaty. I know. I’m weird. Oh! And unfortunately, Julius wasn’t there for most of the process. I missed him!

DSC_0031_01

I used the same recipe from the previous red velvet cupcake attempt. This would be the first time I made it into a cake though. Things seemed to be going okay until we realized that we didn’t have the right sized cake pan! (9″ x 13″). I think we used a 8″ x 12″ pan. Normal people would transfer some of the batter to another cake pan, but not me! So this was my result…

DSC_0037_01

Horrible, ain’t it? Not only did its guts spill out, but look at those cracks! Yikes. I messed up big time. Good thing I was making cake balls, or this cake would be useless. After getting over my failure, I scraped the (baked) part of the cake into my mixer, dumped in some cream cheese icing, and started beating until a dough formed.

DSC_0125

Because Guam is  so hot, I decided to refrigerate the dough overnight so rolling it would be a lot easier.

DSC_0119

I also decided to freeze it a little longer than recommended since I couldn’t turn on the air conditioner at the time. While the dough balls were freezing, I decided to read up on melting chocolate since it would be my first time doing so. I used a home made double boiler, and the whole process went smoothly.

DSC_0130

DSC_0131

Another fun part was rolling the cake balls in chocolate! Even though I was a little sloppy, I had a good time. I rolled the cake balls in batches of four at a time because I was scared they would become too soft if they sat out too long. Ehhh they weren’t coated evenly, but that’s okay. As you can see the final product wasn’t pretty. In my opinion, they were a little too sweet. However, others liked it (especially my brother). I think it’s really up to the eater.

DSC_0137

First attempt: Not a total failure!

Katamari Dama-cookies: Snickerdoodles!

DSC_0072_01

I tried with the title, okay? Don’t judge me. Anywhooooo….

Snickerdoodles. The name is awesome, don’t you think? Earlier that day when we were baking, I was wondering how these delicious cookies got their name. According to Wikipedia (I know we’re not supposed to cite from there, but whatevs! School’s almost out, and I’m getting a head start), snickerdoodles might have come from the German word Schneckennudeln (“snail noodles”), a kind of pastry. Or just a mash up of words from New England. I’m too lazy to do further research, so if there are any snickerdoodle experts out there, feel free to let us know what’s up.

DSC_0057_01

I got the recipe from this sweet blog again. She’s awesome, so go check her out if you want to cook something good.

Fat Fluffy Snickerdoodles

makes 16-20 cookies

1/2 cup butter, at room temperature

1 cup sugar

1 egg

1 teaspoon vanilla extract

1 3/4 cups all-purpose flour

1/4 teaspoon salt

1/2 teaspoon baking powder

1 1/2 teaspoons cinnamon

2 tablespoons milk

1/4 cup sugar + 1 tablespoon cinnamon for dipping

Preheat oven to 375.

Cream butter and sugar with an electric mixer until smooth. Add egg and vanilla, mixing well until combine, about 2 minutes. Stir in flour, baking powder, salt, and 1 1/2 teaspoons cinnamon. Mix until dough comes together. Add in milk. If dough is still crumbly, add milk 1 tablespoon at a time until it comes together. Refrigerate for 30 minutes.

In a bowl combine remaining sugar and cinnamon. Remove dough from fridge and roll into big 1 1/2 inch balls. Dip in cinnamon sugar mixture and place on baking sheet. Lightly press down on dough to flatten it. Bake at 375 for 10-12 minutes.

This is me and Julius’s first time baking cookies from scratch. We did pretty well for our first time (it’s probably because these are really easy to make). Oh! And my mom bought a new stand mixer for the kitchen, so that made things even easier.

DSC_0040_01

I wanted to pick the recipes I’m going to bake for my family’s Christmas party, and I think there’s a good chance that this might be one of them. However, Julius (and a whole lot of other people) are requesting that I make chocolate chip cookies for the holidays too, so maybe I’ll make those instead. Decisions decisions decisions.

Like I mentioned earlier, we didn’t have a hard time making these cookies (baking them is a different story though). The dough (to my knowledge) turned out great. If it’s not supposed to look like that please let me know!

DSC_0050_01

I never knew baking cookies was so fun. My favorite part was rolling the cookies into balls and rolling them around in cinnamon and sugar. IT’S SO FUN.

DSC_0059_01

Rolling rolling rolling. I don’t know about you guys, but I honestly felt like the Prince from the video game, Katamari Damacy. If you’ve played that game before you’re badass. Just sayin’

katamari

DSC_0066_01

Julius was cute. He had a lot of fun pressing the dough balls down with a small ramekin.

DSC_0069_01

Things were going great. The first batch was in the oven, we were working on our second batch, and my kitchen was starting to smell heavenly. You can really smell the cinnamon. If only my house could smell like that all the time…….. Anyways, the first batch came out great. They were fat and fluffy just like the recipe promised! However, disaster struck when I put the second and third batch in the oven.

This is embarrassing, but I’m still going to say it. MY COOKIES CAUGHT ON FIRE!!! Okay, well not my cookies per say. It was actually these burnt pieces of batter that overflowed in the stove when I tried making red velvet cake earlier in the morning. I think I can safely say that I suck at reacting to emergencies. Or maybe it’s just fire emergencies? But it’s still an emergency, so it’s still bad. I know. Thank goodness Julius was there to help put it out.

More good news is that most of my cookies survived. Only three got seriously burnt, but that’s not bad at all.

DSC_0073_01

This is my first baking disaster, and I’m pretty sure there’s more to come. Oh well! Sift happens. (See what I did there? I hope you saw what I did there).

Aki Matsuri: Guam Japanese Autumn Festival 2012

DSC_0020

Guam’s 33rd Aki Matsuri, or Japanese Autumn Festival was held on November 24. It usually starts at four in the afternoon, but me and Julius didn’t want to go that early. Guam is friggin’ HOT in the afternoon. We ended up getting to the festival at around 7pm. It was already nighttime and the festival was packed.

Aki Matsuri is a Japanese festival used to “thank the gods for a good harvest and pray for the well being of each family in the community” (source). It is usually celebrated after the rice harvest in Japan.

Although Guam has one every year, I only started going three years ago. It has become one of my favorite events of the year since then. The atmosphere is great. So many people eating, watching performances, playing games, and just having a good time. Right when we got there, Julius and I (not surprisingly) went to go look for something to eat. There were stalls everywhere, usually run by popular restaurants and hotels on the island.

DSC_0078

DSC_0017

I had a craving for some grilled squid, so that’s where we went first. The line for it was really long and unfortunately, we were one person away when they announced that they ran out!! Great timing, huh? Anyways, there was one good thing that came out of it. Soon after they sent everyone away, the stall right next to it, which was selling tuna sashimi, announced a two for one special. YESSSS. I love sashimi.

Sashimi

Afterwards, we went to get some barbeque chicken kabobs from the Tony Romas stalls. The line for that was long too, but it was no biggy. We decided to sit on the grass in front of the stage to rest and eat. I TRIED to take a decent picture of the kabobs, but I had no patience because I was hungry. We were hungry. And I’m also a noob at photography.

DSC_0071

Nom nom nom. While we were enjoying our food, the fireworks show started! This caught us off-guard because this was the first year we experienced watching fireworks at the Japanese Autumn Festival. Julius was entranced by the show. He LOVES fireworks, so I’m really happy they had some this year. They said that it was for the 40th anniversary of the Japanese Club on Guam. I didn’t take any pictures of the fireworks because 1) I don’t know how 2) I just wanted to sit back and enjoy the show. (I’m gonna insert a picture of fireworks anyway because…yeah I want to set the mood for this post). It was also really romantic! Woot woot

Firework_by_Simple_Sam

[I found this Fireworks picture from Google, but I tried to find the original source. Click here for the credit for this wonderful image~]

After our tummies were full and happy, we went to find dessert. Julius wanted some classic shaved ice so of course we went to get some. He chose lemon and I chose melon. Huh… I never noticed that lemon and melon had the same letters. Awesome. We got some pudding too. Yum!

DSC_0081

DSC_0101

I forgot to mention that the Mikoshi, a portable shrine, was carried around a couple of times. This is an important aspect of the Japanese Autumn Festival. It’s really heavy, so a lot of people have to carry it around.

DSC_0035

I wasn’t really sure of the significance of the Mikoshi in the festival, so I did a little research. According to this blog, the Mikoshi is carried around so that the relationship between the kami, spirits in the Shinto faith, and the people will be strengthened. The blog also mentions that the Mikoshi acts as an “R.V.” for the kami while they venture out into the world to see what’s going on — like a kind of vacation. Interesting!

DSC_0100

DSC_0065

Finally, we couldn’t leave Aki Matsuri without some toys! In the festivals, you usually see many people wear lighted toys like headbands or necklaces. Masks are very popular too. Since we came late, the only masks left were Mickey Mouse and Donald Duck, but I wasn’t complaining! I’m a Disney fanatic anyway, so it was perfect.

DSC_0084

Lighted Toys

Man, I am totally craving for sashimi right now. Until next year, Aki Matsuri!

DSC_0021

Lions and peacocks and frosting… Oh my!

There’s two more weeks of Fall Semester left so that means we’re freaking out! We must FOCUS FOCUS FOCUS~

Unfortunately, we didn’t get to cook today (rescheduled to Saturday), so this is our first non-food post. I was busy finishing up a painting for an art show I’m taking part in. I usually paint with watercolor, but I’m slowly experimenting with acrylic. Here’s the finished piece:

DSC_0036_01

As you can see, I was working with a lot of texture. A couple of people even told me the texture resembled frosting. Frosted peacock……yum? Yeah, not really. Anyways, this was done in one day, and I liked how it turned out! It’s different from my usual work, but it’s good to take risks sometimes. If you zoom in or see it in person, you can see more details.

The other piece I submitted was done with gesso on canvas.

DSC_0039_01

I absolutely LOVE lions, so this piece is a personal favorite of mine. This also took me a day to complete, and all I used on this piece was black gesso. Julius and I couldn’t attend opening night, so I’m not sure what people said about my work. I’m happy with the results though.

Can’t wait to cook tomorrow!